Review Detail
4.7 3 0.5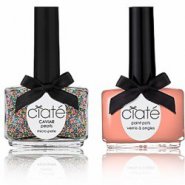
Ciate Caviar Manicure set
Overall rating
5.0
Price
5.0
Quality
5.0
Effectiveness
5.0
Feeling the winter chill slowly creeping up on you? Bummed that your neon party nails will have to be put away for more mundane moody colours? Are you, like me not fond of these dull winter hues?
Well, introducing the yummy, candy coated Caviar nails. Keep the happy, care-free feeling of sprinkles on ice-cream at your finger-tips whole season long.
Ciate is a nail trend powerhouse, introducing us to fashion forward colours and keeping with the hottest nail trends. I, being a nail fanatic was super excited to spot this gem at the nail parlour I go to. Their Caviar Manicure set comes with everything you need to achieve this candy speckled look in 6 easy steps.
First up, the packaging-
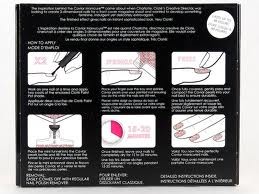
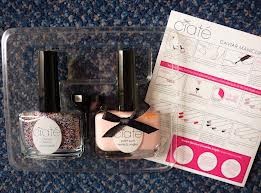
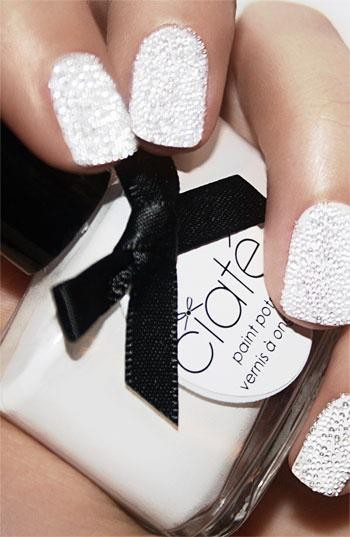
This product is beautifully packaged in a square box with a clear window on the front; this allows you to see your colour choice. The little black funnel can also be seen through this clear window. The caviar range comes in 3 different variants to suit every divas needs; choose from- *rainbow *mother of pearl and *. The set comes with their signature square glass bottles of nail polish with black lid and satin bow; 1 bottle is your chosen caviar pearls and the other the paint pot colour of varnish. A min black funnel and clear plastic tray finish off this pack. The back of the box has all the instructions clearly illustrated.
The nail varnish is smooth and easy to apply. Two coats are needed for coverage and to allow the beads to set onto the nail. The beads are super tiny but with the help of the tray, are just as super easy to apply. The pearls offer long use (approx 40 uses) and multiple styles can be achieved- *full nail *French pearled tip mani and *the accent ring finger look*.
Your six easy steps to candy nails-
1. Nails should be cleaned and any previous nail polish removed. Buffing ails and trimming ragged cuticles also helps ensure a clean, professional finish.
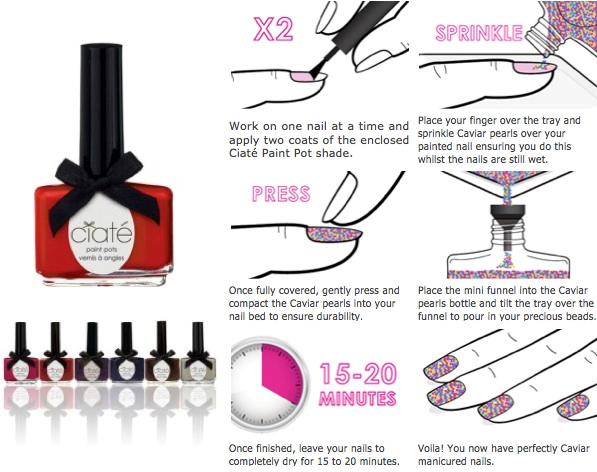
2. Apply a base coat to nails and then 1 coat of your paint pot colour that came in your set.
3. Once the first coat is dry, set up your tray and open the lid of your caviar pearls bottle.
4. Doing each nail at a time prevents smudging and is easier to handle. Paint 1 nail with a second coat of your pain pot shade, next, pour some of the caviar pearls onto the nail. This is done on the tray to capture the fallen beads. Ensure you do this whilst the nail varnish is still wet.
5. Once the nail is completely covered, gently press and compact the pearls into the nail. This keeps the beads stuck down and even. Continue steps 4-5 for the remaining nails.
6. Allow 15-20 minutes to dry completely. Once dried, I applied a top coat to ensure the longevity of my multi-pearled talons.
After all nails have dried completely, insert the mini black funnel provided into the Caviar pearls bottle. Tilt the tray over the funnel to pour back all your un-used beads.
Nails look professionally done and always demand some attention. This is a real gem for only R250 as it contains everything you need to achieve this amazingly textured look.
Well, introducing the yummy, candy coated Caviar nails. Keep the happy, care-free feeling of sprinkles on ice-cream at your finger-tips whole season long.
Ciate is a nail trend powerhouse, introducing us to fashion forward colours and keeping with the hottest nail trends. I, being a nail fanatic was super excited to spot this gem at the nail parlour I go to. Their Caviar Manicure set comes with everything you need to achieve this candy speckled look in 6 easy steps.
First up, the packaging-
This product is beautifully packaged in a square box with a clear window on the front; this allows you to see your colour choice. The little black funnel can also be seen through this clear window. The caviar range comes in 3 different variants to suit every divas needs; choose from- *rainbow *mother of pearl and *. The set comes with their signature square glass bottles of nail polish with black lid and satin bow; 1 bottle is your chosen caviar pearls and the other the paint pot colour of varnish. A min black funnel and clear plastic tray finish off this pack. The back of the box has all the instructions clearly illustrated.
The nail varnish is smooth and easy to apply. Two coats are needed for coverage and to allow the beads to set onto the nail. The beads are super tiny but with the help of the tray, are just as super easy to apply. The pearls offer long use (approx 40 uses) and multiple styles can be achieved- *full nail *French pearled tip mani and *the accent ring finger look*.
Your six easy steps to candy nails-
1. Nails should be cleaned and any previous nail polish removed. Buffing ails and trimming ragged cuticles also helps ensure a clean, professional finish.
2. Apply a base coat to nails and then 1 coat of your paint pot colour that came in your set.
3. Once the first coat is dry, set up your tray and open the lid of your caviar pearls bottle.
4. Doing each nail at a time prevents smudging and is easier to handle. Paint 1 nail with a second coat of your pain pot shade, next, pour some of the caviar pearls onto the nail. This is done on the tray to capture the fallen beads. Ensure you do this whilst the nail varnish is still wet.
5. Once the nail is completely covered, gently press and compact the pearls into the nail. This keeps the beads stuck down and even. Continue steps 4-5 for the remaining nails.
6. Allow 15-20 minutes to dry completely. Once dried, I applied a top coat to ensure the longevity of my multi-pearled talons.
After all nails have dried completely, insert the mini black funnel provided into the Caviar pearls bottle. Tilt the tray over the funnel to pour back all your un-used beads.
Nails look professionally done and always demand some attention. This is a real gem for only R250 as it contains everything you need to achieve this amazingly textured look.


S
Sasha
Top 50 Reviewer